
You can use this tutorial to make any kind of scarf, whether you use pure silk or not. But making a scarf is a great way to get the knack of sewing with silk. The types of silk used for scarves are generally pretty easy for beginners to work with. Another plus is that this project doesn’t demand much material, so it shouldn’t be a shock to your pocketbook.
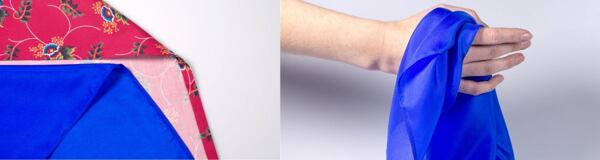
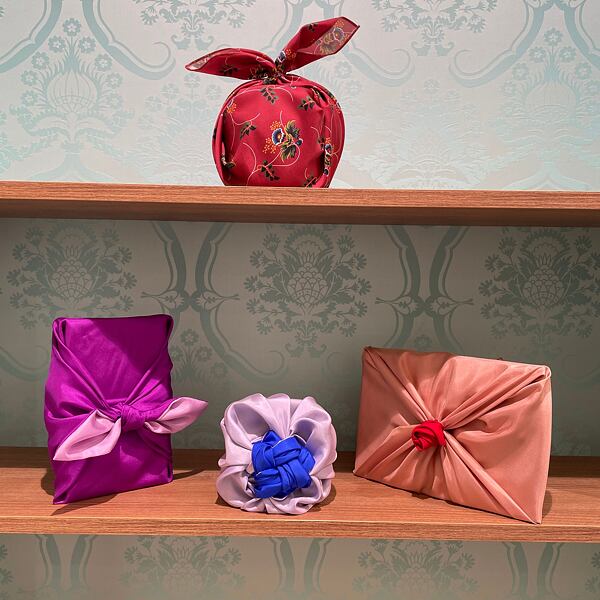
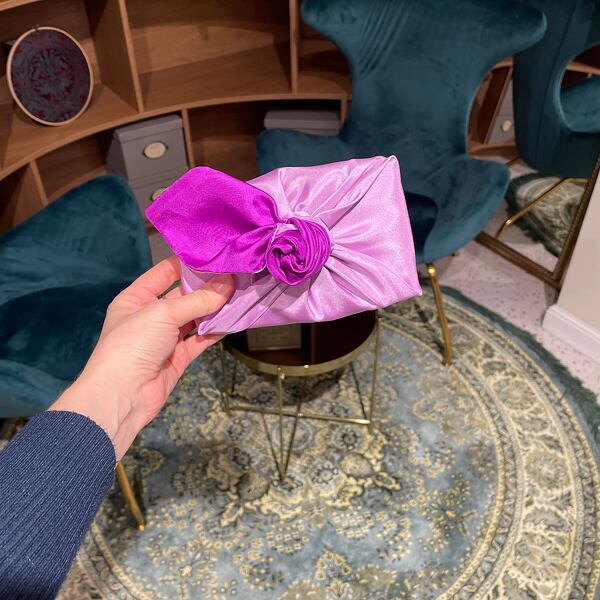
Pure, natural silk will give you stunning, vivid color the way no other material can. A silk scarf has so many uses: Tie it at your throat, wear it as a headband or a bow, braid it into your hair, knot it on a purse strap… in a pinch you can even make it into a carryall. It is also an original and ecological way to wrap presents; get inspired by the Japanese art of furoshiki, which has taken the humble practice of wrapping one’s things up in a sheet before trundling off to the public bath and elevated it to an elegant form of gift wrapping.
If you are an absolute beginner and don’t know where to start, never fear. We’ll walk you through this project every step of the way.
Choosing the right fabric
Scarves call for fine, flowy fabrics, nothing too stiff. A scarf to be used for furoshiki gift wrap or to be displayed, rather than worn, can be of sturdier fabric.
Chiffon and georgette
Airy fabrics like chiffon and georgette are perfect for dressy scarves and summer kerchiefs. In warm weather a scarf can be a priceless accessory – knotted loosely in your hair with nonchalant cool, pulled over your shoulders between dances. Make a note, however, that organza, though also sheer and lightweight, is really too stiff to make a proper scarf.
Habotai
If you’ve ever tried silk painting, your canvas was most likely a habotai scarf. Habotai is a light, moderately sheer fabric that’s wonderful for scarves – it’s easy to work with, you can get it in a broad palette of vivid colors, and it’s relatively inexpensive, so you can sew scarves in all colors of the rainbow and have one for every outfit and every mood. Habotai is also great for furoshiki. This is the ideal material to start with if you don’t have much experience sewing with silk.
Crepe de Chine
Crepe de Chine has a wonderful drape and is unbelievably touchable. Working with it can be a bit tricky, however. This is a lively fabric that can prove frustrating for a beginning sewer.


Serge
Silk serge, or twill, is the classic material for scarves. Those world-famous Hermès scarves are made of silk serge. It is woven with a twill weave, which gives the fabric a subtle, diagonal, textural stripe. Working with silk serge is less difficult than with crepe de Chine. A serge scarf is easy to fold and ties easily into all kinds of creative knots.
Satin
The fabulous gloss of a silk satin scarf comes from its satin weave. Satin scarves make pretty bows and are irresistible wrapped around the waist of a formal gown. However, satin is not often used for scarves for the very practical reason that it’s so smooth that it can’t really hold a knot and won’t stay put in your hair. Also keep in mind that sewing with satin is no walk in the park, so if you are just starting with silk you will want to steer clear. If you do choose satin, use a silk charmeuse, not a heavy duchesse, which is really too stiff for this purpose.
Voile
A silk-cotton voile is an ideal choice for your first scarf. It’s easy to work with, comes in vivid colors rivaling even habotai, and is the most economical material in our short list. A voile scarf can be tied any way you like and is suitable for furoshiki too. Its low price makes it our choice for those who have little experience sewing with silk.


Other materials for scarves
Scarves both for wearing and for furoshiki can also be sewn from cotton or rayon. We carry a select array of sustainable rayons and cottons that set themselves apart for one reason or another (hand printed, organic, dyed naturally). Choose a woven, rather than a knit, fabric. Try a light cotton sateen, poplin or muslin, lyocell, or any of our signature prints in EcoVero.
Scarves for furoshiki can also be made from brocade or linen. A brocade scarf can be a real stunner worn in your hair or tied to your handbag. While it may be too stiff to knot around your throat, it will look great on the strap of your purse or tucked into a breast pocket.


How much fabric you’ll need
Scarves come in all shapes and sizes. The choice is yours.
Neckerchief
A classic silk neckerchief comes in at around 20 x 20 inches (or 50 x 50 cm). Bandanas and other cotton scarves are a bit bigger, from 22 inches (56 cm) to 27 inches (68.5 cm).
Head scarf
A classic head scarf (picture yourself in a convertible with the top down…) can be as big as 60 inches to a side (150 cm). Those classy scarves from Hermès and Aspinal of London measure in at 35 x 35 inches (90 x 90 cm).
Shawl
Large scarves, usually of warmer material, to wrap around your shoulders on a chilly evening are generally 55 x 55 inches (140 x 140 cm).
Furoshiki scarves
The scarf size used for furoshiki naturally depends on the size of the gift. A square scarf 20 x 20 inches (50 x 50 cm) is common – and it can do double time as a neckerchief, headscarf, hairband, or bag ornament. Larger furoshiki scarves can be up to 31 inches (80 cm) or 37 inches (90 cm) on each side, small ones 16 inches (40 cm).
Some tips before you start
Seam allowance
When ordering fabric, don’t forget to add a seam allowance; a generous half inch (1.5 cm) on each side is usually enough. So for a 20-inch scarf, you’ll need a piece of fabric measuring 21 x 21 inches. When choosing fabric, always look at the bolt width; we carry fabric in widths from 27.5 to 55 inches (70 to 140 cm). So if you want to make a larger scarf, make sure the material you choose is wide enough.
Use extra fine pins for silk
The pins used for sewing with silk should be very sharp and should have a diameter of 0.4 mm or less. Like all tailor’s pins, they should have a glass head that you can iron over without doing any harm. Some good choices are:
- Clover Patchwork Pins 0.4/36 mm
- Flashpin Superfein 0.4/34 mm
- Prym Superfine 0.4/35 mm
Best needles and thread for sewing silk
Sew with a universal No. 70 needle or a fine No. 60 needle (e.g. Schmetz Microtex 130/705 H–M 60; Prym Microtex 60).
With a No. 70 needle, use ordinary polyester thread, silk sewing thread (Amann 100% silk, Gütermann silk S 303) or an extra fine sewing thread (Gütermann Extra Fine M 202).
With a No. 60 needle, use only extra fine sewing thread.

Cutting fabric for a scarf
Cut a square of the desired size from the fabric of your choice, including the seam allowance (see the recommended seam allowance for each hem type).
Cotton and brocade are easy to cut, but fine, lively fabrics like habotai, crepe de Chine, and chiffon take more care. Press the fabric with an iron and lay it out on a large enough workspace. Straighten the edges using the edge of the table, the cutting pad, or a yardstick for reference. A handy trick for squirmy fabrics is to lay a sheet of tracing paper, a length of plain cotton canvas, a bedsheet, or a blanket underneath. Anchor the fabric in place with weights or pin it down, but be careful – for silk always use extra fine pins so that you won’t leave holes.
To mark silk, use white tailor’s chalk (colored chalk is harder to get out), a chalk pen, or a disappearing marker (test it first on a scrap of fabric to make sure it doesn’t leave a trace). Cut with a sharp pair of scissors (dressmaker’s shears) or a cutting wheel along a yardstick or other straight edge.
most common hems for scarves
There are several ways to finish the edge of a scarf. Here are the most common.
- Narrow hem – best for fine fabrics
- Hem with mitered corner – best for sturdier fabrics
- Hand-rolled hem – traditional choice for silk scarves
This tutorial doesn’t cover an overlocked edge. If you have an overlock machine and you don’t mind having a visible finishing stitch around the edge of the scarf, you can edge your scarf with a narrow overlock or a rolled stitch. Settings differ depending on the model and can be found in your instruction manual.
Narrow hem
This method is great for finishing a scarf but you can also use it to hem any garment made of sheer material like chiffon, georgette, lightweight crepe, and charmeuse. Sometimes it’s called a “baby hem.”
This hem is sewn on a machine. You can do it by hand, but that is more time consuming.
For this tutorial I chose habotai in electric blue.
 on each side. Start with two opposite sides; fold the edge towards the back 3/8 inch (1 cm) and iron.")
 from the edge.")


 from the edge. Try to lay your stitches along the stitch line you made previously. If you sew a bit farther in, you’ll have two visible stitch lines on the back of the scarf.")

, press, and sew right up against the edge.")
, stop just before the corner and finish the corners by hand.")
 and your scarf is ready to wear.")
Hem with a mitered corner
This neat hem is best for scarves made of sturdier fabrics that hold their shape, such as cotton, linen, and brocade. You can also use it on a tablecloth or napkins with a wider hem.
For this tutorial I chose a lightweight cotton sateen with a period print from our limited-edition collection. I have already taken the finished product out for a spin, and I have to say that it is really pleasantly soft to the touch and is just enough to keep off the chill. This scarf will be ideal for spring and autumn.
 for the seam on each side. Mark the seams on the back of the fabric all the way to the edge. For purposes of this tutorial I used a pencil to make the line more visible in the photos, but you should use tailor’s chalk or disappearing marker, especially if you are working with a light-colored fabric.")


. Press corners and hems all around with an iron.")
 and press with an iron again.")


Hand-rolled hem
A rolled hem is used on silk scarves as well as for garments made of chiffon, georgette, habotai, and silk serge. The work is done by hand and requires some skill. Sewing proceeds from right to left, rolling back the edge with your left thumb and sewing with your right hand; if you’re left-handed, work in the opposite direction. It’s easier to sew if the rolled edge has some tension; this can be achieved by weighing the fabric down or pinning it to something.
. This will serve as a guide as you roll the edge.")
Start rolling the edge a couple of inches (5 cm) from the corner. Roll the edge of the fabric towards the back with your fingers. It takes a little practice, but you’ll soon get the hang of it (sometimes it helps to dampen your fingertips slightly, but not too much – you don’t want watermarks on the silk).
 Start by knotting your thread, tuck the needle into the roll and poke it out just above the back surface of the scarf. Take up just a couple of threads and pull the stitch through; this is the part of the stitch that will be visible on the face side.")
 long. Poke out, pick up a couple of threads, pull through, and return the needle to the roll in the same place. Continue this way until you have a whole side done. At the beginning, your stitches may be a little irregular, but with practice you’ll get into a rhythm and they’ll look much nicer.")


Show it off
Now it’s time to take your fabulous new scarf out for a spin – tie it at your throat, wrap it over your hair, knot it on your purse strap – and enjoy the compliments (and envious gazes) of scarfless passers-by.
If you’ve never really had a thing for scarves, there are plenty of tips online for how to wear one. I especially love them in the spring and autumn, when the weather is a little too warm for a wooly, winter scarf, but the mornings can still be brisk. When it gets warm, I just tie my favorite scarf to my purse as a colorful accent.
Tip
Not so good at English? Just do an online search for “how to wear a silk scarf” or “how to tie a silk scarf” for lots of useful pictures and videos.
A scarf can also do double duty as gift and wrapping in one. For inspiration, look to the Japanese tradition of furoshiki. What’s nice is that the recipient can wear the scarf their gift was wrapped in, or use it to wrap a gift of their own and pass the tradition on.
You’ll find plenty of tutorials for furoshiki online. Scarves work nicely for boxes and books, but are especially useful for oddly shaped objects like bottles of wine or perfume, chocolate collections, and more; they conform to the shape of the item without tearing like tissue paper and they look great. Perfect!


Comments(1)