Anatomy of a pillow cover
A typical throw pillow cover has a simple construction. It's basically a square sack – sometimes rectangular or round – with an opening in the back.
It has two parts:
- Front, made of one single piece
- Back, made up of two pieces with a closure
Two approaches to pillow covers
Depending on how you want to place your pattern and how many seams you want the pillow to have, you can choose one of two approaches for sewing it.
- Three-piece cover: Sew a cover with a front panel and two back panels
- One-piece cover: Center a single piece of fabric on the front and fold it over to the back
A one-piece throw pillow cover will have seams on only two sides. If you want to trim your pillow with fringe or piping, you'll want seams all the way around.
How big should a throw pillow be
As a rule of thumb, a throw pillow cover should be the same size as the pillow, no smaller, no larger.
That means the first thing you need is the pillow itself. Then you'll know what size you're working with. The standard size for a throw pillow is 18 inches or 24 inches for a large one (in Europe 40 x 40 cm or 50 x 50 cm). You can retire an old pillow and re-cover it or pick up a new pillow insert in any housewares or craft shop.
If you want a custom size or shape, it's easy to sew your own pillow insert. All you need is a piece of plain fabric and some filling. Polyester fiber, shredded memory foam, and pellets are common filling options, but you can also use buckwheat hulls or another natural alternative.
If you have your heart set on a feather pillow, you will need special fabric, known as ticking, which is especially tightly woven to keep the feathers from poking out.
Best fabrics for a throw pillow
The sky is pretty much the limit when it comes to choosing material for your cover. Any relatively sturdy fabric will do the trick.

If you're up for the challenge, take your pillow covers up a notch with embroidery, lace trim, or a hand-painted motif.
Add a splash of brocade
Luxurious, exclusive brocade does not have to be expensive. There are many reasonably priced classic brocades in gem tones and striking patterns that will make your throw pillow something special.
Looking for a true treasure? Browse over to our historical brocades for patently unique fabrics that will stand out in any interior. While the price is higher, remember that a little goes a long way, and since this brocade won't be sitting somewhere in the back of a closet, you'll be able to enjoy it every time you see it winking at you from the divan.
And the winner is...
For this tutorial, I am working with a wonderful historical cloth-of-gold brocade. The pattern is arranged in repeating roundels, each measuring 14.5 inches (37 cm), which works perfectly for a round or square pillow. I'm working with European sized pillows at home, so I'll choose between a 40 cm or 50 cm square (roughly 16 inches or 20 inches).
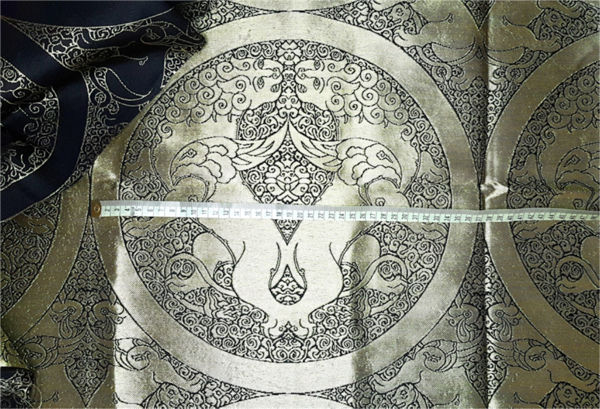
Which size is better? Keep in mind how the pattern will sit on the finished product. Remember, a pillow is not flat. Any part of the pattern that is close to the edge will disappear over the horizon. To see how my pattern would fare, I laid it over pillow inserts in two sizes. Notice that on the smaller pillow, the edge of the roundel gets a bit lost. The choice is clear – we'll sew for the larger pillow.

Doing the math:
how much fabric for a pillow cover
How much fabric you'll need depends on the size of the pillow insert, the bolt width and the size of the motif. If placement of the pattern is important (as it is here, where we're centering a single, large motif), you have to make sure you allow for this. That may mean up to twice as much fabric.
Fabric width for a throw pillow
This brocade is 58 inches (148 cm) wide, so there's plenty of room; we'll need 2 x 20 inches + seam allowance (2 x 50 cm + seams). Even a 44-inch bolt (112 cm) would be fine – though it would be close – as long as the fabric does not shrink too much. For a smaller pillow this would be no problem at all.
For a narrow 28-inch (72 cm) bolt, only a very small throw pillow cover would fit – 12 inches or less (30 cm). For a standard or larger pillow, we would have to double the length, that is twice the pillow cover size plus seam allowance.
A "length" of each side of a 20-inch pillow means 20 inches plus the seam allowance; two "lengths" are two times 20 inches, again plus the seam allowance on both sides. To be safe, also add some extra for shrinkage and fraying; if the calculations show that 23 inches are needed, round up and buy at least 24, or better yet 30.
Cutting pieces to sew:
One-piece pillow cover

Three-piece Pillow cover

For a simple project like this one, you can either make a paper pattern or you can sketch your pieces directly on the fabric. A paper pattern can come in handy if you aren't sure how you want to place your design and you'd like to eyeball different options or if you want to take the pattern to the fabric shop to have in hand when choosing material.
Throw pillow cover closures
This tutorial will show you how to make a pillow cover with a classic envelope closure – two panels overlapping at about a quarter to a third of the way across the back of the pillow.
Start with the back panels
The placket where the back panels overlap should be 3/4 inch wide (2 cm). For a smaller pillow you can get away with a bit less and for a larger pillow you can make it wider. The placket is double-folded, so it has three layers of fabric, making it sturdy. The rough edge is hidden inside. See the photos below.
For each placket, then, you will need about 1 1/2 inches (3.5 to 4 cm). Add to that the overlap – the outer flap overlaps the inside flap by about 3/4 inch (2 cm).
Together that makes 3 inches (9 cm) extra for the back closure that I was talking about above when we were adding up how much fabric to buy. Add another 1 1/2 inches (3 cm) for seam allowance if you are using a three-piece pattern (3/4 inch per side).
Choosing a closure
How to close the back? There is more than one option here – do you want a zipper, buttons, or nothing at all? If you aren't very confident in your skills, there's no shame in leaving the gap just as it is. The pillow insert sits snugly as it is, and you can always add snaps or buttons later.
If you think you'll want a zipper, it's better decide up front because it's not easy to add later.


Sewing pillow covers by hand or machine
A throw pillow cover is one of those projects that you can handle without a sewing machine. It takes a bit longer, but it is not hard – just a few straight seams. If you are sewing by hand, use a backstitch. The smaller your stitches the better they'll look and the better they'll hold.
On a sewing machine, all you need is a straight stitch and a zigzag stitch.
Sewing throw pillow cover – step by step
Time to start sewing. This tutorial will show you, step by step, how to sew a throw pillow cover with a button closure. (For instructions for adding a zip closure, see our related post on Sewing a silk pillow.)
Start with the back opening
If you are using a one-piece pattern, there will be a placket strip at each end; for a three-piece pattern, there will be one on each back panel where they overlap.
Fold the edge towards the wrong side of the fabric, slightly less than 3/4 inch (1.5 cm).

Fold over again, this time a full 3/4 inch (2 cm).
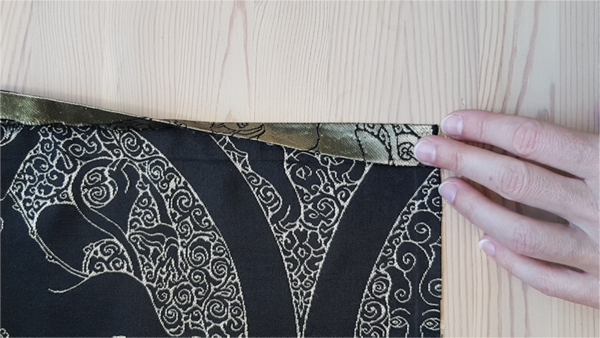
Press the folded edge with an iron – a sharp edge is easier to sew – and pin in place.
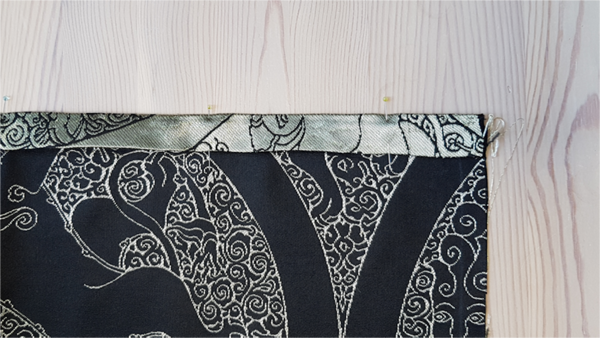
Sew right along the edge of the foldover as shown below. It is easiest to sew with the wrong side facing up for a nice, straight seam.
If you are adding a zipper, this is the time to do it – just place the zipper along the seam and sew it at the same time. If you are using a zipper, it must be added before you sew front to back.

Using a one-piece pattern
If you have opted for a one-piece pattern, the next step is to fold it, right sides facing in, on each side where the edge of the pillow will be. I measured to make sure the design is centered and marked the fold line with chalk on the back of the fabric.

For solid colors or for patterns where there is no optical central point, marking the fold is not as important. But you should still make sure all of the edges are straight and that the final cover size is correct.
If you have measured right, the plackets should overlap perfectly. Pin the edges where you will be sewing it together.
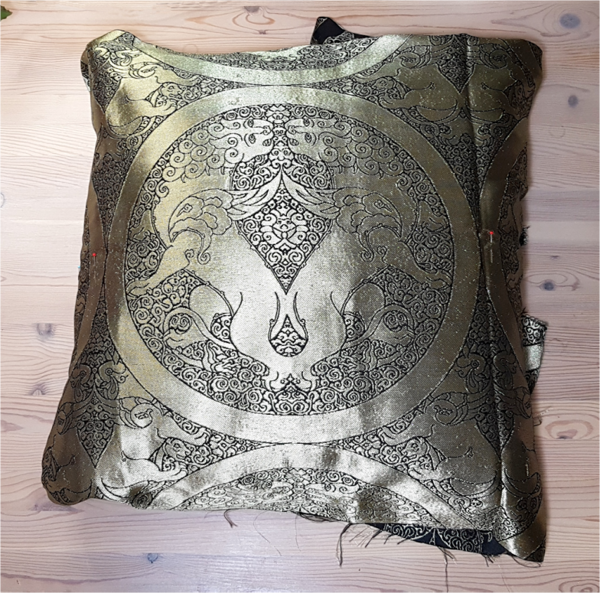
In this case the design does not meet up perfectly on the back of the pillow, but that doesn't really matter. If you want to make sure the pattern on the back lines up, you have to use the three-piece pattern.

Using a three-piece pattern
If you are using a three-piece pattern, line up the back panels so that the plackets overlap exactly. Pin them together. The result should be a back piece that is the same size as the front piece.
Lay the pinned back piece on the front piece with the wrong sides facing out. Line up the edges (if the pieces don't fit, make sure you haven't overlooked a step) and pin all around.
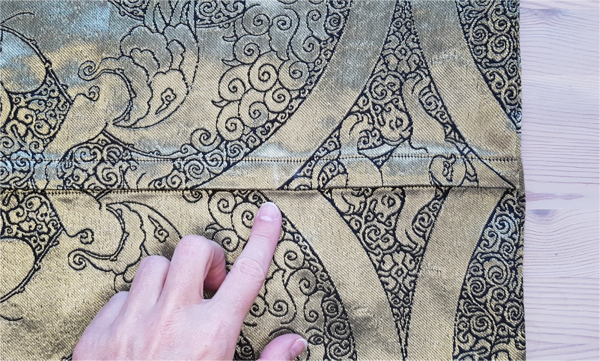
Sew front and back together
Now it's time to sew the front and back together. If you are using a one-piece pattern, sew the two pinned sides. For a three-piece pattern, sew all the way around.
If you are not confident in your sewing, do just one side at a time – two opposite sides first and then the other two. The danger of sewing all around in one go is that the fabric can slip and the whole cover can come out crooked. It can happen to anyone.
Finish the seams
Trim all seams to about 3/8 inch (1 cm). Trim off the corners, cutting almost to the seamline so that they turn out nicely. Finish the seams with a zigzag stitch or serge. If you are hand sewing, finish the edges with an overcast stitch. If you have pinking shears, you can finish with those.

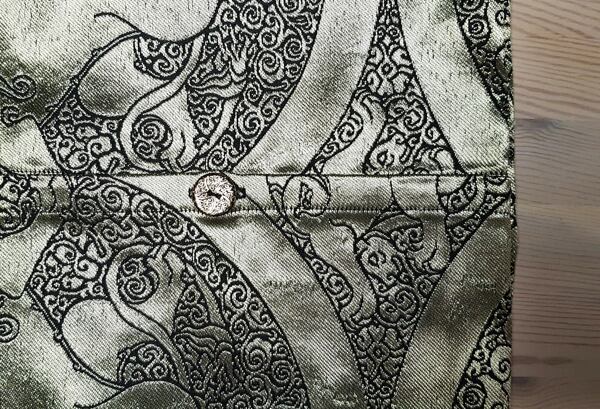
Stop, admire, add buttons
Turn the pillow cover right-side out and pop in the pillow insert for size. How does it look on your couch? On the loveseat? On the bed in the guest room? Bathe in the glory of your accomplishment for a moment. Now, if you want buttons, get out a needle and thread and two buttons – a good size would be 5/8 inch (15 mm).
Using chalk, mark two spots on the closure placket, each about a third of the way across the pillow.
Sew button holes into the upper flap at the points marked. The button hole should be the size of the button plus a scant eighth of an inch. Most sewing machines have a setting for buttonholes. See your machine's instructions. Sew first, then cut the opening with a pair of small, sharp scissors. (If this is your first button hole, try it out on a scrap of fabric first.)
If sewing by hand, first sew the outline of the buttonhole with a dainty running stitch. Then cut the slit and sew all around with thicker thread using a buttonhole stitch.
Now line up the buttons and sew them on the lower flap.
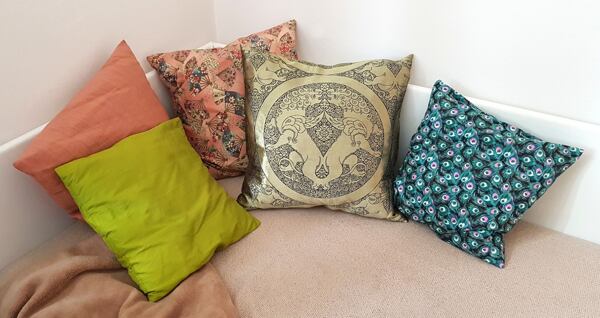
Enjoy your throw pillow
And that's it. Your new throw pillow is ready to go. Plump it up and find a home for it on your couch.
24 April 2023
#tutorial

Comments(0)