A textile face mask won’t provide one-hundred-percent protection from the virus, but it’s certainly better than nothing. The main thing is that you won’t spread any germs to others. It’s also a great way of using scraps.
The face mask pattern
For this do-it-yourself mask, I’ve made a two-piece pattern that fits to your face – any face mask worth its salt has to hug the contours of your face. The pattern is cut large so that it will cover the chin, giving you and others the best protection.
To get started, download this face mask pattern. The pattern includes a quarter-inch (¼") seam allowance, about the width of the foot on your sewing machine.

Face mask pattern (with tunnel for elastic straps) PDF |
You can secure your face mask either around the ears or behind the head. An ear loop is inconspicuous and more convenient if you’ll be taking it off and putting it back on often. The elastic may start to annoy you after a while though and it’s tricky getting the length just right.
Fastening behind the head is more secure and the mask will sit well – this is a better solution if you’ll be wearing it long term because it won’t pull on your ears. But you can’t hide it… the elastic will be there for everyone to see. Of course, in short hair it might get kind of lost.

Face mask pattern (sewn-on elastic straps) PDF |
Material for your face mask
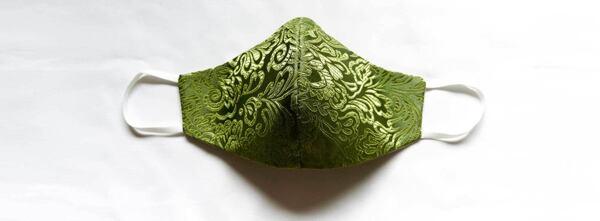
Chose whatever your heart desires for the outer layer. Cotton or linen is probably most practical, because they’re easy to wash at 60°C. But that’s what everyone is wearing, so why not go for it and grab something outré like brocade(!) Use a non-silk variety that can be laundered at least at 40°C. It may shrink a bit, but you can smooth it out with an iron.
You should definitely back your face material with a non-woven material like a classic fusible interfacing, ideally a heavier, stiffer one. Though I’m not usually a fan of fusible interfacing because it’s always coming unstuck, it’s the best choice here – it works as a kind of filter because the gaps between fibers are much closer than in a classic woven textile. You could also, however, use our fusible canvas, which will hold the fabric perfectly.

Line your face mask with a tightly woven cotton or linen. The looser the weave, the less functional the face mask will be.
How to care for your face mask
You should disinfect your face mask after each use. Ideally, simmer it at 90°C (just below the boiling point) for 10 to 20 minutes in a pot – of course only materials such as cotton and linen can stand that sort of handling. If you’ve used a more delicate fabric, wash your mask at a lower temperature with a disinfectant solution, or spray it with an alcohol-based disinfectant, iron it, put it under a UV lamp or into a sterilizer... Steam sterilization is an excellent option too – just put your mask in a vegetable steamer over a little water in a covered pot and steam for 10 minutes. The mask will only get damp and will dry quickly and the material and the wire on the bridge of the nose won’t get damaged in your washer’s spin cycle. It’s definitely a good idea to have more than one mask, so that you always have a fresh one to wear. Be careful: You cannot disinfect a facemask with a wire nose bridge in your microwave, for obvious reasons! Besides that, your face mask could catch on fire, so don’t try this with any face mask… the fire department will thank you.
Be careful how you handle your mask. After use, do not touch the mask itself, hold it by the elastic straps when you’re removing it and disinfect it immediately. If you take off your mask when you are out and about, put it into a plastic bag before throwing it into your backpack or bag. It’s a good idea to carry a spray disinfectant that you can spray it with from all sides as soon as you’ve taken it off. When your mask gets too damp from your breath/body heat, change it right away… a virus loves moisture. J
If you’re curious: We tried boiling brocade (rayon polyester blend), silk, and linen in a pot for 20 minutes. To our great surprise, it came out unscathed, save for some slight shrinkage in the brocade and linen.
Step-by-step: Face mask with elastic bands
Cut a piece of interfacing 18 x 31 cm (7" x 12¼") and iron it to the back side of your outer fabric. Make sure the dotted side of the interfacing is touching the back side of the material. Your iron should be on a high setting (e.g., cotton) – press the iron to the fabric and wait, then move, press, wait, and so on. If the interfacing isn’t holding well, you need to push down and wait longer.
If you haven’t got fusible interfacing, you can make it without it. Your face mask just won’t hold its shape as nicely.
Technically you should iron with the short side parallel to the warp of the fabric, so that you maintain the direction of the fibers – in the photos I have it the other way because I was using a scrap where it didn’t fit any other way ????

Now you can cut the pieces – I folded the fabric and the lining in half and laid them on top of each other, then pinned all four layers and cut them all at once.
Sew together the outer layer and the lining – in this pattern the seam allowance is about the width of your feeder foot, slightly more for an industrial machine. It doesn’t have to be exact. ???? From here on out you’ll see a different brocade in the illustration photos – that’s just because I have better pictures from that one. ????


Press your seams open – it will help if you notch the seam allowance in several places, but it works pretty well even if you don’t.


Use a sleeve board or something with a round edge to make ironing easier.

If you’d like, you can reinforce the seam with a strip of interfacing or fusible canvas.

Cut the elastic for the ear loops. Use a soft, stretchy elastic. I used a 0.6 cm (¼") width and cut it 14 cm (5½") long, but definitely try it on first. If your elastic is tighter (or your ears lie farther back), you may need a bit more, maybe 15-16 cm (6").

Pin the elastic to the mask about 0.6 cm (¼") from the upper and lower edges and machine sew it on near the edge within the seam allowance (less than a quarter inch).


Pin the outer fabric and the lining face to face.

On the upper and lower edges, pull the lining out a tiny bit, maybe 0.3 cm (1/8") – that will keep your lining from buckling up inside the mask.

Sew the seam at about the width of the foot, leaving about 8 cm (3") open so that you can turn it right side out.
You can skip this part if you don’t want to sew a wire into your face mask. But if you’ve got one, use it – the face mask will sit much better. You can use electrical wire, a twist-tie, whatever.
Cut a 9 cm (3½") length of wire and finish the ends if possible (try nail polish). If you don’t finish the ends, it’s not the end of the world, but unfinished ends can rust or poke through the fabric in time.
Sew a short tunnel into the seam allowance along the upper edge of the face mask, about 10 cm (4") long, and insert the wire, then sew the ends closed.
Trim the corners of the seam allowance and notch the curved areas around the nose. Turn the mask right side out and iron.


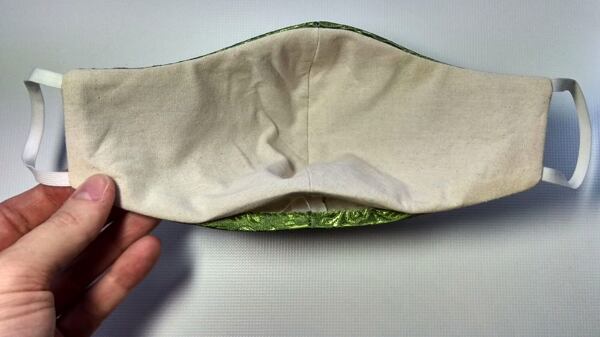
This step is optional, but it will make the face mask more durable – Sew along the seam on the face side from the top to the gap at the bottom. Tuck in the lower edge of the lining so that it lies just inside of the edge.


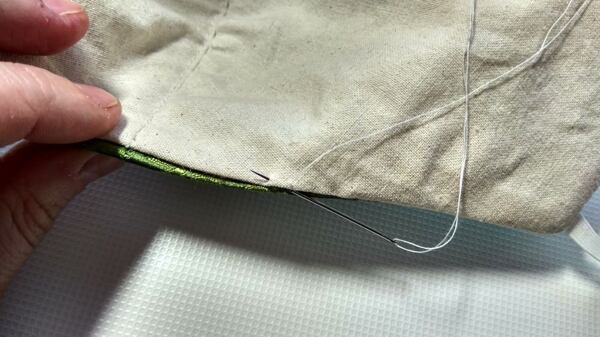
From the back side, hand sew the gap on the lower edge closed. You can also sew around with the machine (watch out for the wire though).
Done!
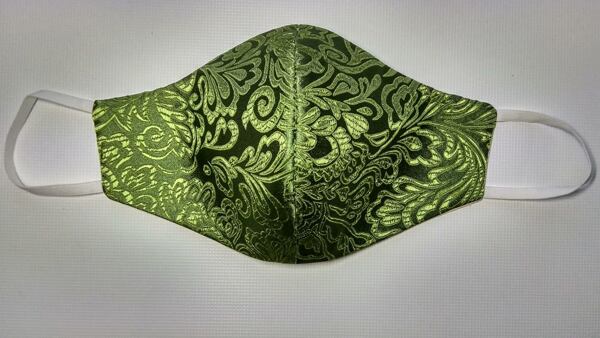
Alternative option: Mask with tunnel for elastic straps
This is similar to the mask above, except that the pattern is elongated, reaching towards the ears, where there are tunnels for your elastic straps to pass through. This has the advantage of being adjustable. The one I did here has elastic fastenings that go over the head, but you can also make short elastic ear loops. ????

The steps are more or less the same as for the mask above. Just leave out the step where you attach the elastic – sew it all around, leaving a gap to turn it right side out, and iron it.

Fold the left and right edges inward, about 1.5 cm, and sew in place as shown.

Insert a length of elastic through the resulting tunnel. If you’re doing an over-the-head model, you’ll need about 70 cm. Machine stitch the ends of the elastic together, trim, and hide the join inside of the tunnel.

Done!
updated 1/17/2021

Comments(0)