What we're sewing
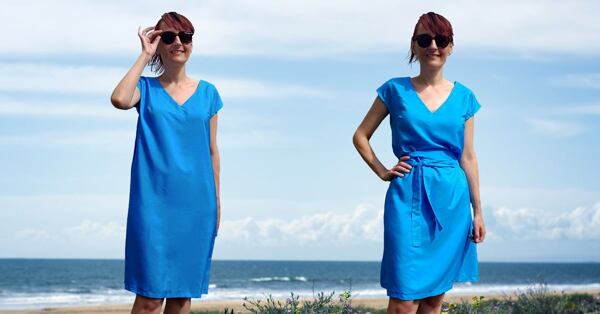
Today we'll be making a classic summer shift dress in pure silk.
Because this tutorial is meant especially for beginners, we’re using a super simple pattern – a sleeveless A-line dress that slips on over your head.
What you'll need
- A pattern
- Silk fabric, 2–2½ yards (ca. 180–240 cm)
- Interfacing for the neckline
- Polyester thread
- A roll of tracing paper, tailor’s chalk, sharp scissors, a sewing machine
- Time and patience :)
Choosing a pattern
If you’re just getting your feet wet with sewing, start with a store-bought pattern. That way you can concentrate on the job of learning to sew without learning to draft too.
This tutorial uses a simple pattern from Burda (6221) that you can find online, but you can also hit your local fabric shop and pick up something similar.
What you're looking for is a simple shift dress with no bells and whistles. And to make things easier, we're leaving out the pockets.

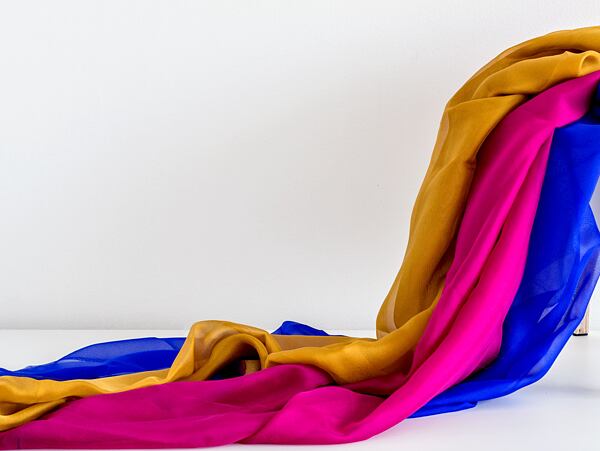
Choosing fabric
Any fabric that’s not too stiff would be good for this dress pattern.
Beginners should choose material that’s easy to work with, like wild silk or spun silk, that holds its shape when you cut and sew.
For my dress, I've chosen wild eri silk in a pretty sky blue. It proved really easy to handle. Other great choices might be a plain weave in wild muga silk or a spun mulberry silk if you can get your hands on any.
An interesting alternative would be dupioni. If you wash it first, it softens and has a nice drape for this pattern. Dupioni really dresses up this simple shift; it all depends on the look you’re going for.
If you are a more experienced sewer, crepe de Chine would be gorgeous for this simple little dress. However it is pretty slinky – tricky to hold in place when cutting – a lot like silk charmeuse. So if you’re just starting out, don’t go this route.
Beyond silk, good choices for this project include lightweight linen, cotton, and rayon (any weave lyocell, EcoVero, or modal).
Figuring yardage
For a knee-length dress
Our pattern makes a dress that comes to the knee, a length of about 36 inches (92 cm). It calls for 2½ yards (230 cm) of fabric regardless of bolt width.
If you are using a wider bolt, as we did for this tutorial, you should be able to fit the belt next to the dress pieces when you cut, so you can save almost a foot (25 cm) in yardage. So you’ll only need 2¼ yards (210 cm).
Longer or shorter
Lengthening the dress is simple. Just add 4–6 inches (10–15 cm) at the bottom. To make a mini, shorten by the same amount. Don’t forget to adjust the length both in front and back; the total will be 10–12 inches more or less.
- Longer dress – roughly 2½ to 2¾ yards (230–240 cm)
- Shorter dress – roughly 2 to 2¼ yards (180–190 cm)
Before you pick up your scissors
tracing the pattern
You could cut the pieces straight from the original pattern paper, but then you couldn't re-use it for a different size. It’s a better idea to trace the pattern onto a clean sheet of tracing paper (sold by the roll in fabric stores).
Different sizes are marked with their own dotted or dashed line. On our pattern, the solid line is the same for all sizes.
")
- Lay the tracing paper on the printed pattern and weigh it down (books or coffee cups work great). Take your time tracing and copy all of the marks from the original. Some of the pieces look like they’re only half there – we’ll get to that later.
- Cut the piece from your paper. Do not use your sewing scissors for this! Paper will blunt them.
The pieces are labelled and numbered on the pattern sheet. We’ll need the front (#1), back (#2), front neckline (#4), and back neckline (#5). You probably don’t need to trace the belt pattern (#6) – just draw it straight on the fabric with a yardstick.

Adding the seam allowance
Most printed patterns do not include the seam allowance – the extra we leave around the edges for seams and hems. Sketch these directly onto the fabric. That way you know where to cut and where to sew.
Don’t forget the seam allowance when you lay out your pieces on the fabric. Always leave enough room between pieces.
- The standard seam allowance is 5/8 inch (1.5 cm) – add it around all edges
- For the hem at the bottom, add 1½ inches (4 cm)
Laying out the pieces
Your pattern will have a layout plan that shows where to place each piece on the fabric for cutting.
- For a 45-inch bolt (114 cm) the pieces are staggered to make room for everything
- For a wider, 55-inch bolt (140 cm) the front and back pieces are lined up on the fold
- We are leaving out the pockets, so you can use that space for the belt

Time to trace (again)
Get your pattern pieces ready!
- Fold the fabric lengthwise according to the layout plan (here a wider fabric is folded in half but a narrower fabric is folded one third, just enough to fit the front panel)
- Place the front panel with the center line exactly on the fold. The edge that forms the center line is usually marked, but you can tell which one it is just by looking ;-)
See why the pattern pieces are halvsies? When you lay them on the fold and cut, you get a perfectly symmetrical piece… like cutting a paper doll.
- Smooth the fabric out carefully and pin the pieces in place (leave some room between pieces). In the picture you can see that I cut the dart out of the paper pattern to make it easier to trace the dart line. Don’t cut it out of the fabric though!
- Trace around each piece with tailor’s chalk. Then remove the paper and set aside.

- Leave the fabric folded and pin it in a few spots to keep everything lined up.
- Trace a second line around each piece for the seam allowance 5/8 inch (1.5 cm) from the edge. For the bottom hem, make it 1 1/2 inches (4 cm).
I have a handy tool in my sewing box, a chalk wheel, that I can run around the sewing line and it automatically marks the seam allowance. If you don’t have one, use a ruler.

Cutting the fabric
Take a deep breath. Have you got everything traced?
- Grab your sewing scissors and cut the front panel.
- After cutting, turn it over and mark the darts and other marks.
Professionals mark the line with a loose stitch and then trim the thread inside, between the two pieces; I used pins.

- Now trace and cut the back panel.
- The front and back pieces for the neckline facing will fit on the fabric scraps; lay them on the fold to make a mirror image. This time, add a seam allowance only on the inner and shoulder edge – see the picture.

Time to sew
Before you start sewing
Choose a needle and thread suitable for your fabric. For eri silk, I used an ordinary polyester thread and a universal machine needle and foot. Sew a couple of inches on a scrap first to check the thread tension.
If, instead of pinning, you plan to baste the pieces together – sewing with long, temporary stitches to hold pieces together – use a fine needle and ordinary thread (not basting thread). Test first to make sure basting won’t leave visible holes in your fabric.
Get out your iron, a small pair of scissors, and some silk pins.
And stop worrying – a shift dress is pretty forgiving, so you have room to make a few mistakes.
Sewing step by step
Sewing any garment has its own logical progression. For this dress, we'll be working in this order:
Darts always come first
Sewing the darts is always one of the first steps. This dress has side darts at the bust, one on each side of the front panel.
- Fold the dart along the center line, with the face side of the fabric facing in (you sew from the back).
- Pin and sew along the marked sewing line for the dart, starting at the edge; keep sewing until you go off the fabric at the point of the dart.
- Cut the thread, leaving enough to tie a knot by hand.
- Iron the dart down towards the bottom.
Finishing the point of the dart, especially on fine fabric, requires a delicate hand. But even if it’s not perfect, ironing it down can do wonders.

 and front (right)")
Shoulders
- Lay the back panel face up and put the front panel face down on top of it.
- Line up the shoulder seams and pin in place.
- Sew along the sewing line, locking the stitches at the beginning and end (three stitches forward and three stitches back).
- Press the seam open with the iron.
- Finish the edges with pinking shears or a zigzag or overlock stitch.

Neckline
Now for the trickiest part of this project, the neckline... take it slow and easy :-)
To make the neckline nice and clean, we use a facing the same shape as the neck opening. This little trick means no rough edges will be visible at the neckline when you wear the dress.
Both pieces of the neckline facing will be reinforced with fusible interfacing.
For fine silk fabric (eri silk, crepe de Chine) or lightweight rayon fabric use a featherweight woven interfacing like our fusible interfacing for silk.
For heavier fabric (dupioni, linen, cotton) try our lightweight fusible interlining or a non-woven interfacing such as Novopast 20+15 gsm.
The interfacing I used for this dress is a bit too stiff for my taste. Try to choose one that works for your fabric.
- Cut the interfacing the same shape as the facing piece
- Iron it onto the back of the facing piece
- Line up the two reinforced pieces with the right sides facing each other
- Sew together at the shoulder
- Iron seams open; you don't have to finish the edges

- Open and spread out the partially sewn dress – lay it on the table face up like a table cloth
- Place the neckline facing face down on the neck opening as shown – make sure you line up the shoulder seams
- Pin or hand baste in place

Sewing the neckline
Sew the neckline with the facing on top. It will be easier to keep everything lined up and avoid wrinkles.
- Sew the neckline 5/8 inch from the edge (1.5 cm). Tip: Start at the point of the V and stop at the shoulder.
- Do the other side the same way.
- Sew the back of the neckline last, starting in the center and working towards the shoulder, then turning and sewing from the center to the other shoulder.

Mirrored sewing is a trick that helps guarantee good results even with slippery fabrics. Gauge your skill and sew accordingly – I did the whole neckline in two fell swoops, from front center to back center on each side.
- Trim the seam allowance by half and make notches at intervals along the curved edges. At the V point, trim close to the sewing line.
Trimming makes the facing easier to turn out.

For a perfect neckline
To keep the facing from turning out when you put on the dress, use this little trick.
- Arrange the neckline so that you have the dress fabric on your left and the facing and seam allowance on your right.
- Sew about ¼ inch (5 mm) from the seam line on the side with the facing and seam allowance. Stop short of the V point, as shown in the picture.


Finish the neckline
- Turn the facing to the inside of the dress.
- Straighten it and iron it down.

- Finish the edge of the facing with pinking shears if you have them – fabric backed with interfacing resists fraying, but wearing and washing can take its toll.
- Take a needle and thread and anchor the facing to the shoulder seam with a few stitches.
When shaping the point of the V neckline, be careful not to bunch up the fabric. Actually, this is probably the single most difficult thing in this whole project. This is why it’s so important to trim back the seam allowance here.


Sewing the sides
The rest is smooth sailing.
- Turn the dress inside out.
- Pin the sides and sew from the mark at the bottom of the sleeve opening all the way to the bottom.
- Press the seam open with an iron and finish the edges with pinking shears or a zigzag or overlock stitch.
- Don’t trim the seam allowance.

Finishing the sleeves
The usual way of finishing a sleeve opening is with bias tape or facing. But we’re having none of that!
The sleeve opening on this dress is hardly curved at all. In fact, there’s no sleeve to speak of, just a gap to put your arms through.
All we’ve got to do is fold the edge over.


- Turn the dress inside out and fold the seam allowance back as shown.
I hand sewed the edge with tiny, invisible stitches. At the curves I had to make a few notches in the seam allowance. Some fabrics have less flex so they aren’t as forgiving in curves. A bias tape would look more professional, but we can do without it here.
- As always, iron well!
Finally, the hem
Now it’s time to hem the dress. If you want tips for a perfectly straight lower hem, jump down to the next section for some pointers and then come back.
- Fold the hemline under by 1½ inches (4 cm) and iron.
- Sew by hand or by machine (if you use the machine the stitches will be visible).

Tips for a straight hem
No matter how hard you try, how straight you cut, and how nicely you iron everything in place, the moment you try on your dress, you’re bound to discover that your hem is crooked.
Why does this happen? Sometimes the fabric is to blame (knits seem to be the worst) and sometimes it’s our own curves.
Here’s how professional tailors tackle this problem:
- If you’ve got the time, put the dress on a hanger for a couple of days.
- Put on the dress and get a helper.
- The helper sits on the floor and, with the help of a tailor’s square (or a yardstick) and a piece of chalk, marks all around the skirt at the desired height from the floor.
- Fold and iron your hem using the marks as your guide.

If you can’t find a helper for this job, don’t despair. There are a couple of tricks for marking a hem on your own – you can tie a chalked thread between two chairs at hem-height and brush your skirt up against it. Or get yourself one of those fancy hem markers that puff out chalk dust.
Don’t knock yourself out worrying about your hem. There's time for that when you are a more experienced sewer.
belt
This is absolutely your call. If you prefer a belted silhouette, by all means go for it. Maybe you have a nice belt that will work with this dress – try a number of styles – or you can sew one to match.
Our belt measures 5 or 6 feet (156–176 cm) depending on the dress size. If you cut it crosswise, you’ll need to make it from two pieces. If you can fit it on the fabric lengthwise, you should make it in one piece. Both ways are fine.
- Cut out a simple rectangular piece 3 inches wide (8 cm) plus seam allowance, so a total of 4 inches wide (11 cm). If using two pieces, sew them together first to get a long strip.
- Fold the piece lengthwise inside out and sew – start at the middle and sew to the end and around the short edge too, then start near the middle again, leaving a gap of a couple of inches (5 cm) and sew to the other end.
- Trim the corners down to the seam line to make them easier to turn out.
- Turn the belt right side out through the gap in the middle.
- Iron and sew the gap closed by hand.
If you want to, you can sew all along the belt, really close to the edge where the seam is. This provides reinforcement and makes it easier to iron after it comes out of the wash. I left mine as is.


To belt or not to belt
Now, will you wear your dress loose or belted? The choice is yours.
The nice thing about a simple summer shift like this one is that you can wear it both ways for an A-line or hourglass silhouette, whichever suits you best.
If you’ve made it this far, you are the proud new owner of an elegant silk shift that you can wear to the beach or take out for dinner and drinks. Good work.


Congratulations, you're finished.
Now go show off your new dress!

Comments(0)